Photo marking required parameters
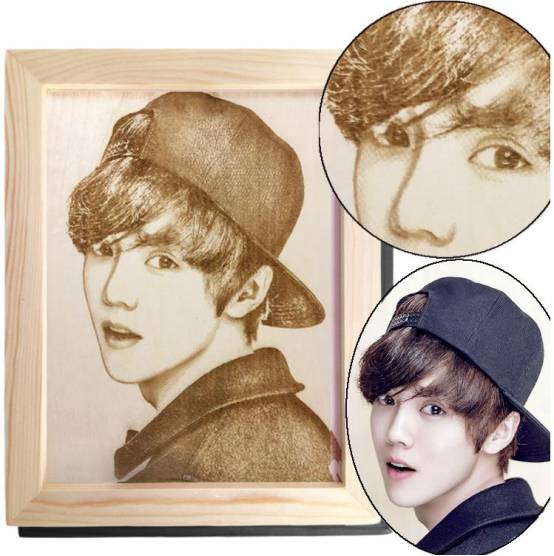
Character picture: The silhouette of the character is clear, the contrast between the character and the background color and contrast is large, and the brightness is moderate;
Scenery picture: The subject scene (highlighted scene) has a large contrast with the background color and contrast, and the brightness is moderate; and the fine scene is reduced as much as possible. If the laser is better, you can select the picture with sharp details. If possible, do not choose the details themselves. Scenery with various burrs;
Text-based images: Different treatments are used depending on the highlights of the highlighted or highlighted images. If you want to highlight the text and directly mark the bitmap effect is not good, you can extract the text in the original picture and mark it with a vector diagram, using EzCad2.0 software or CorDRAW and other software. The method is as follows: import the original picture into EzCAD2.0 software or CorDRAW software, draw the text in the original picture in the software, select the font or the approximate font that is consistent with the text in the picture, and draw it with the "node editing" function in the software. The text exactly matches the text in the picture, and the appropriate fill type and line spacing (if necessary, the text in the original picture can be removed) is marked.
Set the software parameters correctly
There are two settings for the selected bitmap bitmap: "Dot Mode" and "Adjust Point Power Mode". In general, select the “mesh pattern” when marking the bitmap on the metal material. In the non-metallic materials and special cases (such as marking the bitmap on the denim material), select “adjust point power mode”. . Among them, the "adjustment point power mode" is the "grayscale" mark we often say.
In the setting of the parameters, in principle, the quality is ensured while taking care of the speed, and the marking speed is increased as much as possible if the quality can meet the requirements.
Explanation of basic parameters:
Fixed DPI: The resolution of the graphic, which is set according to the spot size of the laser, generally between 100 and 1000. The larger the DPI value, the sharper the image, but the smaller the spot size of the laser, the longer the processing time. DPI: refers to how many points per inch, 1 inch is equal to 25.4 mm.
Reverse: Check this box to indicate the reverse color of the graphic and adjust this setting according to the material being marked.
Grayscale: Check this box to convert the color graphics to grayscale graphics and the color graphics to 256 grayscale images.
Dot: Similar to the "halftone pattern" function in Adobe PhotoShop, using black and white two-color images to simulate grayscale images, and black and white to simulate different grayscale effects by adjusting the density of dots. Check this box to indicate that the graphic is marked in the form of dots, and the graphic after marking is arranged in a dot matrix.
Two-way scanning: refers to the scanning direction of the bitmap during processing is a two-way scan. If the start delay and end delay settings of the laser machine are not very suitable, checking this item will cause the dot arrangement to be misaligned, so this item is generally not checked. But using two-way scanning will be faster.
Dot mode: refers to whether the laser is always on when processing each pixel of the bitmap, or whether each pixel is on for a specified time. This setting should be set according to the specific conditions of the laser machine. Some laser Q power supplies will not emit light when the marking time is set less, and the time should be increased. Generally, the speed is guaranteed. This time is set to the correct output of the laser machine, and the power is appropriately increased when the power is small.
Adjust point power: refers to whether the laser adjusts the power according to the gray level of the pixel when processing each pixel of the bitmap. When using this setting, you should also adjust the specific power mapping value in "Power Mapping", which is generally set between 3% and 15%. (Detailed settings are described later)
Extension: Two "Extension" buttons allow you to do some simple processing on the graphics and change the direction of the sweep and set the interlaced scan. Depending on the particular situation, depending on the texture of the material, it may be necessary to change the scanning direction, generally without adjustment.
In the "Advanced" parameter button, there are:
Jump speed: refers to the jump speed of the galvanometer from one point to another when the laser machine is not emitting light.
Jump position delay and jump distance delay: It indicates the settling time of the given galvanometer after each jump is completed. Give enough delay time to stabilize the galvanometer and then emit light to ensure the smooth spot.